The key to innovation often lies in finding new insights from customer research. Learning new things about customers lives helps us understand the context in which they engage with the products and services we create for them.
So how do we go about finding insight? Doing so requires some art and creativity, but it does not have to feel like such a mysterious process. Whether you are a beginner or a seasoned veteran, here is a short guide to help you and your team get on the same page about the synthesis process.
Step Zero: Conduct research.
I will leave the nitty gritty details of how to effectively conduct research to another post (or workshop), but at the bare minimum you need to talk to some customers, ask them questions, and take notes. You’ll want to write down things like: what they like/dislike, challenges they face, interesting quotes, and activities and behaviors they exhibit.
What they tell you depends on the product or service you are designing and the questions you ask. However you do it, at the end of conducting research, you should have a bunch of notes from all the interviews, observations, and other research activities you have conducted. You can now begin the process of trying to find insights. We often referr to this process as ‘design synthesis’.
Step One: Debrief and bite-size research
With research notes in hand, it’s going to be a lot easier to find insights and patterns if you can separate the notes you have and play with the data. You want to be able to move information around so you can mix and match bits from various interviews and observations and discover themes and patterns.
The process of bite-sizing your research involves transferring the notes you have taken to digital or physical post-its. This can seem like a daunting task, but it is absolutely necessary in order to be able to find and communicate patterns within your team. Our brains are not capable of parsing all the information from multiple interviews in our heads, so we need to physically separate bits of information so we can work with them.
After each research activity (interview, observation, etc), transfer your research notes that seem relevant to (digital or physical) post-its. The best practice for this involves conducting a team debrief immediately after each research interview or observation. This helps you pool your collective observations and can trigger deep thinking within the group early on. Do not wait too long after an interview to debrief and bite-size notes. Teams that do so risk losing nuanced information and observations that can lead to insights later on.
In the debrief, each member of the research team takes turns reading out information from their notes that they found interesting. Someone else in the group captures the key points on a sticky notes. These might be things like: key quotes, statements about like/dislike, pain points or challenges, attitudes or behaviors, or something else you find interesting. When writing research ‘bites’, each post-it should contain one piece of relevant information.
Debriefing takes time, so plan to spend about 2/3 as long on the debrief of an interview as the length of the interview itself. For example, spend 60 minutes of debrief/bite-sizing for each 90 minute interview.

I typically transfer anywhere from 50-80% of my notes to post-its depending on the quality of the interview. You don’t need to transfer everything, but when in doubt, err on the side of more vs less. You never know what may lead to insight and you can always ignore things that don’t fit later.
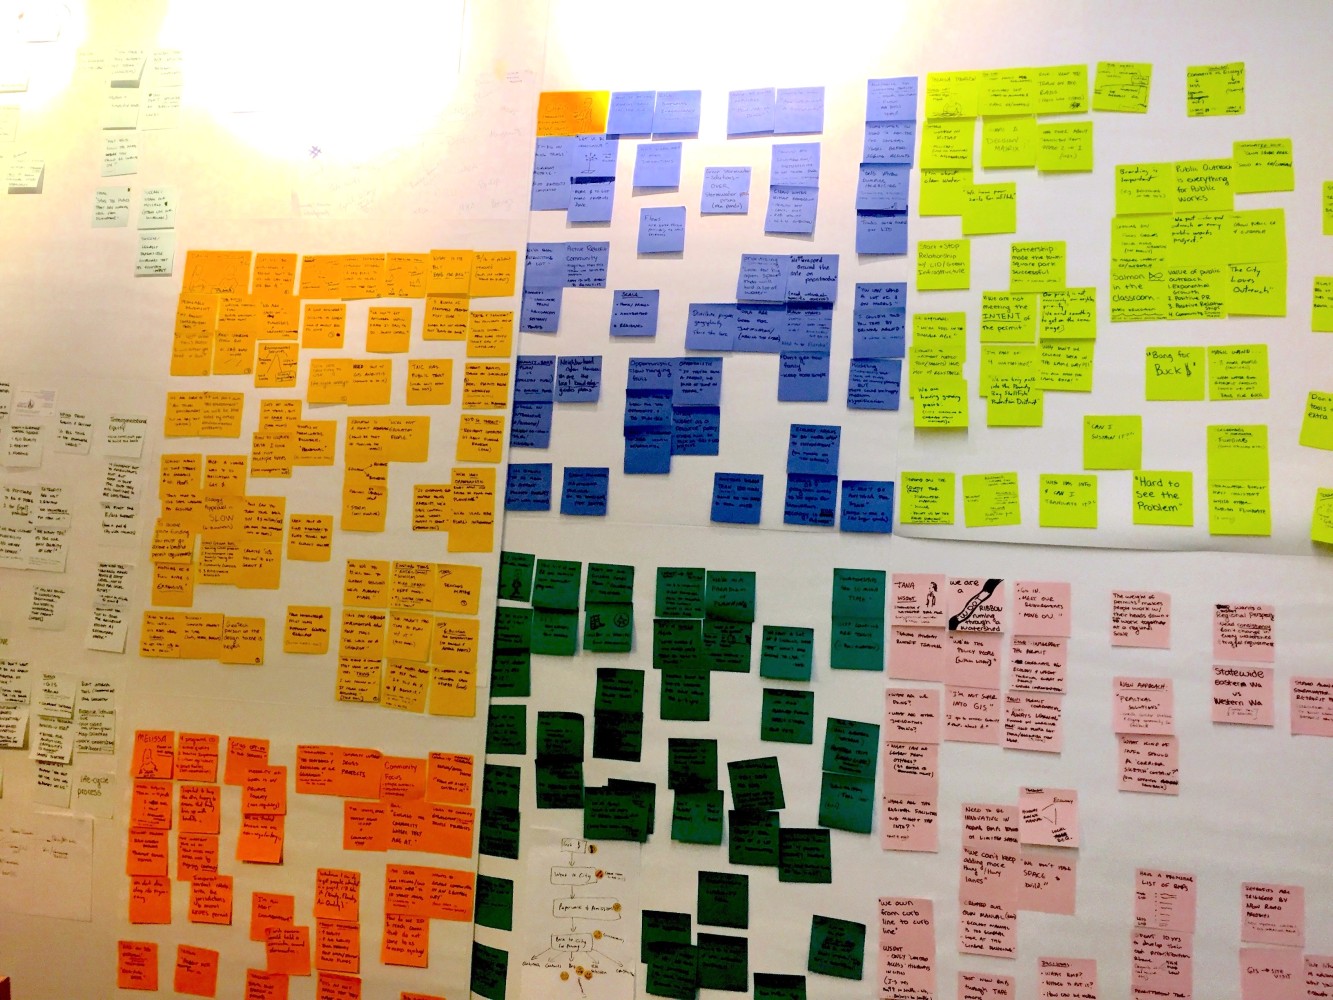
Here is a picture of what you might have after multiple interviews. Assigning specific colors to each interview or observation can be helpful to track back later on who said what.
Step two: Look for patterns
Once you have transferred your research to sticky notes (digital or physical), you are ready to begin the process of looking for patterns across the entire lot.
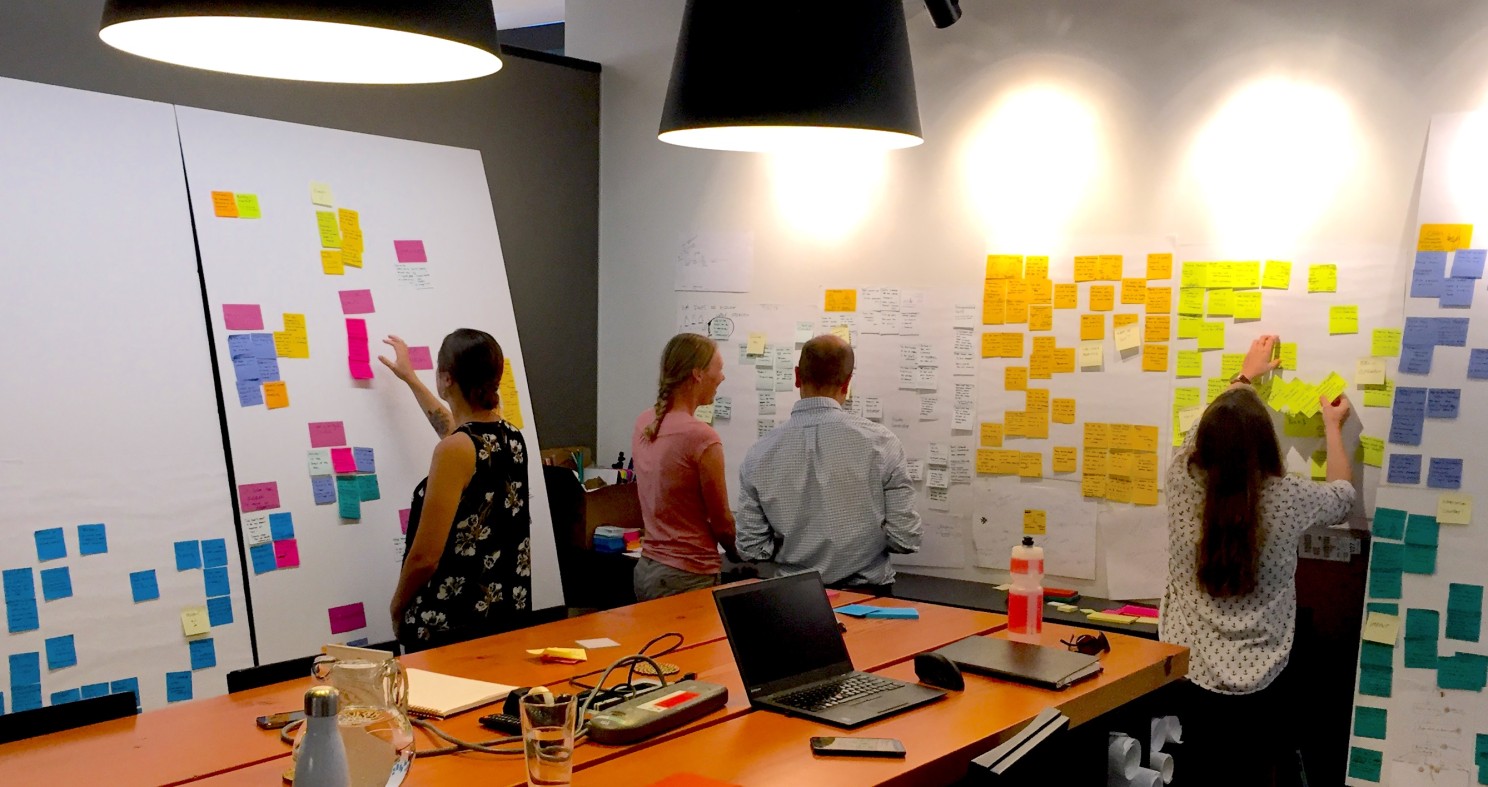
The goal of this exercise is to end up with post-its grouped by affinity or theme on a new board so that you can eventually extract insight statements from these groupings. This process is often referred to as ‘affinity clustering’ or ‘affinity mapping’. Affinity clustering takes time and usually involves a lot of discussion and iteration, so settle in with your team. It’s worth carving out the time to do this well. Depending on the number of interviews and observations you have conducted, you may need a few sessions for this process. It is not uncommon for a design team to spend more than a week on this for a larger project.
When you are ready to begin affinity clustering, start by taking a few pictures or screenshots of your research boards before you move anything. You never know when you may need to go back and review past work or double-check who said what.
Then, begin the clustering process by moving one post-it at a time to an open area… a large wall or blank foam core board for in-person work, or open space on a digital collaboration tool like Mural or Miro for virtual work.
How you start moving and clustering is up to you. For small groups and sets of data, you might have one person facilitate an open discussion and the movement of post-its to the new board. Have them pick a sticky-note at random and say something like “Here’s a quote about __. Does anyone else see any other post-its that might be related to this?” Others would then chime in with a post-it or more that could go with it on the new board. The work continues like that until all post-its have been moved to the new board and grouped in various groupings.

Another way that works well for clustering as a team is to do a ‘silent sort’. The silent sort can help speed up the process of getting to a first draft of groupings when you have a lot of data to work with.
The silent sort works like this: Everyone in the team works in parallel in silence for a period of time to get a first draft of groupings on a new board. A key rule when doing this is that anyone should feel licensed to override placement by anyone else if they feel that a post-it might go better with a different grouping. In fact, disagreement can be productive and the seeds for rich discussion later on.
To that end, after the silent sort, make time to review the contents of the initial groupings out loud together and discuss. Change things as you like and aim for agreement on your clusters. This takes time to do well, so plan accordingly.
Keep in mind that there are no ‘correct groupings’. The value of this exercise is in the discussion and debate that happens as the group tries to work out what goes where. The process of creating groupings is up to you and your team.
Step 3: Identify themes and iterate
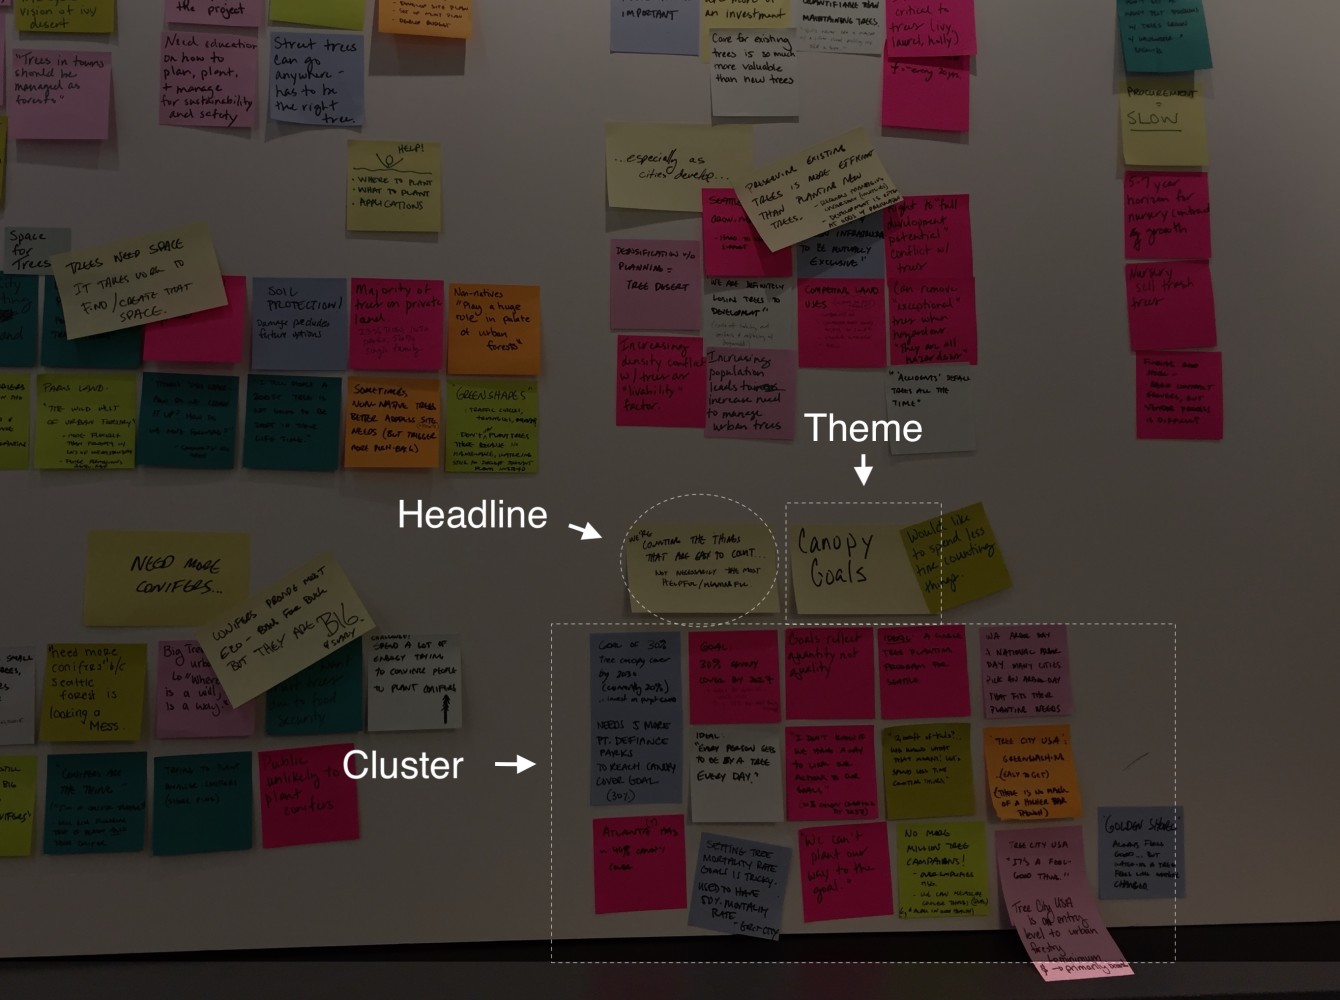
Once you have create groupings of similar post-its, label each grouping with a different post-it to identify the relevant theme of the cluster. Usually a theme is a single word like ‘autonomy’ or ‘tradition’ or ‘breakfast’ and depends on the project.
Regardless of the word you pick, one-word themes may change, so don’t get too attached to them. The first best guess at the themes is rarely the best grouping, so consider reshuffling groupings as you discuss and debate as a team. This can help you discover new patterns that might not have been obvious at first.
Try breaking apart large clusters into sub-groupings, combining smaller clusters, or picking pieces of a few clusters to put together under a new theme. Another trick you might try to trigger new perspectives: Grab three post-its at random and try to find a common theme among them. It doesn’t always work, but this exercise will push you to explore non-obvious patterns.
Step 4: Write headlines
Once you have captured a theme for every cluster on your board and iterated a few times, you can begin to unpack the ‘so what’ of each themed grouping.
Themes help us see the big picture of areas worth paying attention to from our research, but to be able to communicate learnings from research to others, and to set us up for finding insights, we need to craft statements about what each cluster is telling us. We do this by adding to each theme a headline.. a one sentence summary of each cluster.
Once you have identified themes for your clusters, work with your team to add to each theme a headline Ask yourselves ‘what is this cluster telling us?’, write that down on a post-it, and stick it next to the theme. Another way to put this might be, “If that cluster could talk, what would it say?”.

You want your headline to say something helpful and novel so it garners attention. If you end up with something like “People like our app, but also struggle with using it”, it’s probably not news worthy. It doesn’t tell you anything profound. Keep working.
If on the other hand your headline is closer to “Parents are caught between caring for young children and aging parents”, you are starting to discover and convey information that grabs people’s attention and could inspire a team to generate new ideas.
Whoever you share your research with wants to know that your research efforts were worthwhile. Create headlines that make them say ‘ooh…, interesting!’.
Step 5: From headlines to insight
Once you have headlines, you are well on your way to discovering insight. In some cases, crafting an insight statement is simply a matter of refining your headline to make it read as something more ‘insightful’.
What do we mean by insight? The goal is to discover knowledge that is deeper than surface level. The word insight essentially means ‘deep understanding’. How deep depends on what you and your team already know. What is insightful to you individually may be different than what is insightful to anyone else. So it is important to work with your team to craft insight statements together. You are collectively trying to discover and articulate findings that will be insightful to your organization. Good insights should help everyone understand people’s experiences more deeply than they do now.
Insights come from pairing your existing knowledge about the world with the new knowledge (headlines) you have gleaned from research. So one way to generate insights from headlines is to use a ‘Mad Libs’ style prompt like this:
We observed {headline} . Combining that with what we already know about the world, we wonder if this means: {Insight} .
Here is an example of what that might look like in practice, from a past project we worked on with a large company hoping to shift customer behavior:
“We observed that people often try new foods when they are travelling (headline). We wonder if this means that Connecting with people when they are outside of their regular routines is the best opportunity for us to introduce them to new things (insight).”
In practice, the insight itself often takes the form of: an unexpected tension, an ‘aha’ moment or new perspective, or a human truth. Not every cluster will yield an insight and not every insight will be tied to a single cluster, but all of your insights can help your team align and get inspired about where to go and what to do next.
Give it a try and let us know how it goes!
